How Nu-Glaze® works
Follow our comprehensive step-by-step preparation and installation system to ensure long-term frame preservation and flawless application.
Pre-installation planning
Before handling materials, walk through these foundational planning steps to map your job details accurately.
Identify profile
Determine exactly which profile size and configuration is required for your window style.
Choose method
Determine whether the full installation or frontal installation method will be predominantly used.
Calculate material
Measure your window perimeters to determine how many 2,4-meter lengths will be needed.
Submit details
Send your choice of profile, quantity of 2.4m lengths, name and surname, delivery address, email address, business name and VAT number (if applicable) to johan@nu-glaze.co.za.
Executing the job
Step-by-step field workflow for preparing and fitting the Nu-Glaze system successfully.
Clean the frames
Proper adhesion requires pristine glass-frame junctions. Select your method below.
In the situation where the glass needs to stay in place, just clean everything in front of the glass 100% until a sharp, clean 90° workspace is reached.
If wood beadings are present: Pry beadings loose, remove nails, and clean the rebate 100%. Remove all back putty to yield a clean, sharp 90° corner if the glass can/must be removed.
If old putty is present: Entirely scrape and remove old putty to ensure a clear 90° workspace.
Always clean wood frames afterward with thinners or methylated spirits to remove oils, dust, and moisture.
For standard steel frames: Remove old putty to yield a clean 90° angle. Wipe thoroughly with thinners or methylated spirits.
For F4B frames (hollow steel sections): Try to keep the existing putty inside the hollow if it is still structurally sound. If it is failing, use filler sections as per instruction guidelines (e.g., Spacer sets from our catalog or hard plastic 3-4mm thick × 7-9mm wide).
For New Frames: Wipe down with thinners or methylated spirits before proceeding.
Sand, paint & glass prep
Sand and paint your window frames carefully, then thoroughly clean and prepare the glass panes. Use a blade scraper to clean glass of old paint and or putty completely. Never use Terpentine as oil is left on the surfaces, that will prevent silicone to stick. Use Methylated Spirits, Thinners or a soluent that will remove oil and dirt.
Cut the Nu-Glaze profiles
Always cut the profiles in this systematic sequence: start at the bottom horizontal, move to the 2 vertical sides next, and finish with the top horizontal piece.
Execute your selected installation method
Select and follow the specialized application instructions according to your chosen approach.
When cutting the profiles with the Miter Cutter, please keep the bottom of the profile absolutely flat on the base of the anvil.
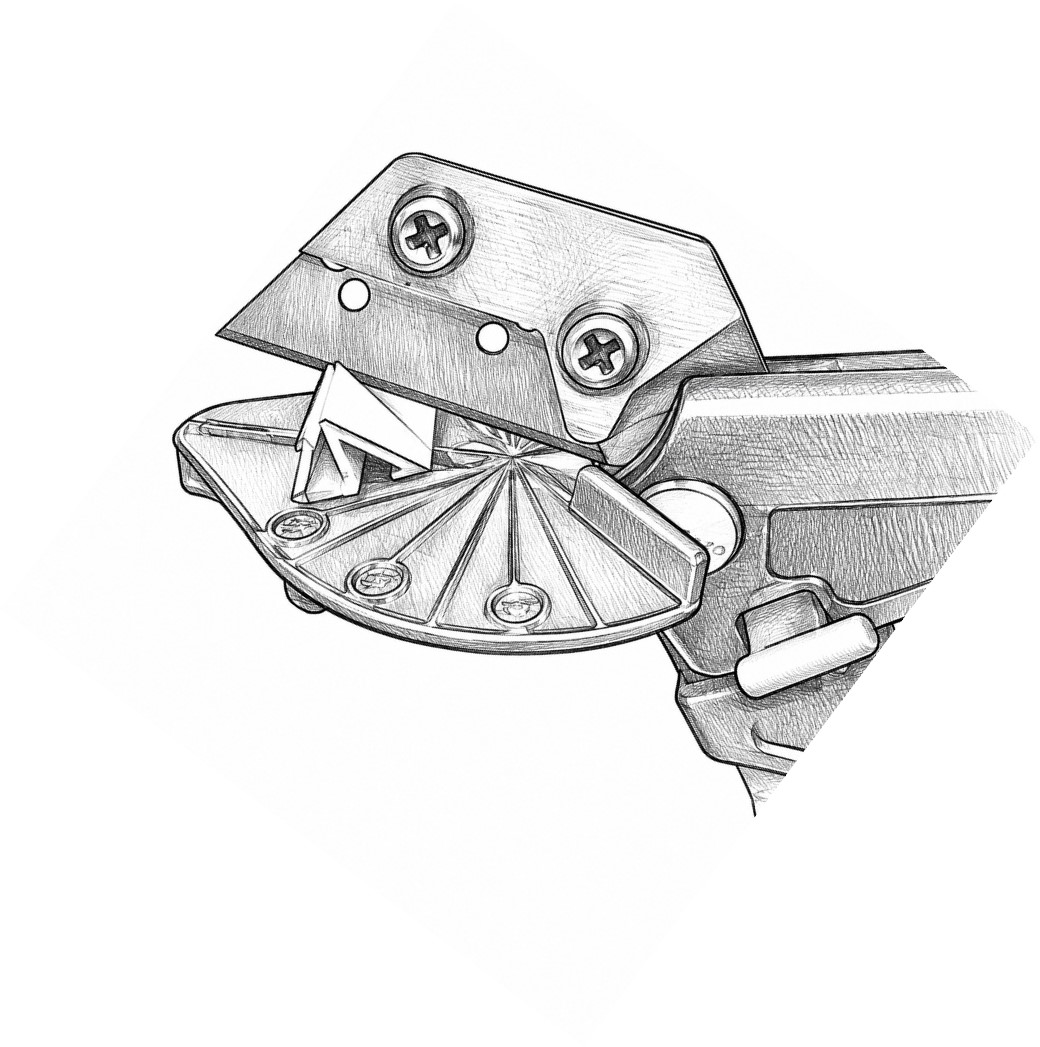
Method A: Full installation
Ideal for new frames, where new glass is needed or if the total frame need to be treated, ie rust.
- 1 Measure and execute the Miter cutting as per guide on the Best Practice way to Miter (hardcopy is provided with the MSX-1 cutter).
- 2 Dry fit each profile segment directly onto the glass pane to construct a modular sub-assembly.
- 3 Insert this complete dry sub-assembly directly into the window frame rebate—do not use silicone yet.
- 4 Trim profiles where necessary. Re-test adjustments until you achieve a 100% satisfactory fit.
- 5 Remove profiles from the frame. Extrude silicone directly into the built-in U-groove channel of each profile. Slide them back onto the glass in order: bottom first, next the 2 vertical sides, then lastly the top horizontal. Set this sub-assembly safely aside.
- 6 Apply a continuous 3-4mm diameter bead of construction-grade neutral cure silicone along the window frame rebate per instructions.
- 7 Now take the 'siliconed' glass and Nu-Glaze sub-assembly, carefully press it into the frame rebate, and push profiles firmly outwards against the frame to seat fully.
- 8 Verify that all corners line up perfectly and profiles rest completely flush against the frame surface.
- 9 Clean and wipe away any excess squeezed out silicone immediately using a cloth dampened with methylated spirits.
- 10 Apply colour-matched siliconized acrylic (SiAc) to fill minor hairline gaps (< 2mm wide) where needed, wiping excess immediately with a damp cloth. NB. don't allow SiAc to dry, do small sections at a time, cleaning as you go.
Method B: Frontal installation
Ideal for replacing old glazing material (ie putty/wood beading). Where the glass cannot/should not be remove (ie retro fit).
- 1 Measure and execute the Miter cutting as per guide on the Best Practice way to Miter (hardcopy is provided with the MSX-1 cutter).
- 2 Start with the bottom horizontal piece. Cleanly snap off the back lip channel, dry test the remaining front section in the rebate without silicone, and trim until perfectly flush.
- 3 Once satisfied, apply silicone onto the frame as per diagram. Right around, continuous 3-4mm diameter beading with a thumbnail size blob in each of the 4 corners.
- 4 Embed/press the bottom horizontal Nu-Glaze section onto/into the silicone on the frame rebate, ensuring good contact with the silicone. Rotate slightly if needed to achieve a 45° face angle with the glass and frame.
- 5 Next, do the same with the 2 vertical sections, one by one. Ensuring perfect alignment of the innermost and outer corners. Rotate both pieces if needed to achieve perfect fit.
- 6 Fit the top horizontal piece last, verifying that all corner angles and outer faces meet beautifully at a precise 100% match.
- 7 Clean and wipe away any excess squeezed out silicone immediately using a cloth dampened with methylated spirits.
- 8 Apply colour-matched siliconized acrylic (SiAc) to fill minor hairline gaps (< 2mm wide) where needed, wiping excess immediately with a damp cloth. NB. don't allow SiAc to dry, do small sections at a time, cleaning as you go.